HomeWish ListLive Support
Shopping Basket - £0.00

You have no items in your shopping basket.

home improvement

  • WHY IT’S IMPORTANT TO KEEP YOUR RADIATORS CLEAN

    A lot of us probably take our central heating system for granted.

    We switch it on, our home gets nice and warm and cosy, we put our feet up and all is well with the world.

    But did you know that keeping your radiators free from dust and dirt is really important and could save you a good chunk of money on the cost of heating your home?

    Leaving dust and dirt in-between the fins of your radiators will mean that it is harder for the heat to escape.

    This means that your radiator will have to work much harder to heat your room, for a longer period, costing more money and making a bigger dent in your finances.

    In short, heating your home can become difficult and expensive with dusty and unclean radiators.

    So, keeping on top of the dust and dirt that accumulates in and around your radiator – and making it part of your daily or weekly cleaning routine – is definitely a good idea.

    We can’t promise that it will make you an overnight millionaire, but it will ensure your home heats up quicker and lead to a more efficient heating system that WILL save you money and energy in the long run.

    So, because we’re a helpful bunch at BestHeating, we decided to put together these top tips for keeping on top of those dirty radiators, so they stay glossy, gleaming and in good working order for many a year to come.

    WHY DOES MY RADIATOR KEEP GETTING DUSTY?

    You may not know this, but there is dust in the air all the time, it really is everywhere – and it’s not just dust either.

    If you have a cat or a dog you can guarantee that there will be hair in the air and, if you’re a smoker, you’ll also have nicotine residue to think about too.

    All this dust and dirt will clump together and become trapped in your radiator because of the currents of air that circulate warmth around your home.

    These convection currents see warm air rise and cool air fall. As the air begins to sink it takes dust and dirt with it and as that gets drawn up through the radiator it leaves the debris behind – clogging the fins around the back and across the top of your appliance.

    It’s this dirt that you need to keep on top of to ensure your radiators are working to their optimum level.


    WHAT DO YOU NEED TO CLEAN YOUR RADIATOR?

    Right, so are you ready to get those radiators all shiny, clean and looking like new?

    Great!

    But before you pull your gloves on and get started be sure that you have these few things to hand and primed for use:

    • Your trusty vacuum cleaner
    • A duster (or maybe two)
    • A bucket filled with warm and soapy water
    • Sponges and cloths
    • An old bath towel or a dust sheet
    • A long thin stick (like a metre ruler or a yardstick)
    • A roll of Sellotape

    SO, LETS CLEAN THOSE RADIATORS

    Simply follow the next few steps and you’ll be basking in the glow of clean and shiny radiators again in no time – it’ll be like you’ve just bought them from our store!

    First thing’s first, before you start to clean your radiators switch your heating off and make sure all the one you’re cleaning has cooled down.

    Grab your vacuum cleaner and try your best to get as much of the dust and dirt from in and around your radiator – it could be you have some slim attachments that you could use to get right down in-between all the fins, but don’t worry if not.

    If after you vacuum there are still a few bits of dust and dirt that you haven’t managed to shift, this is where the metre ruler/yardstick comes in handy.

    Place your dust sheet or towel on the floor underneath your radiator and - using a bit of Sellotape to secure it in place - put a duster on the end of the metre ruler and begin to push the remaining dust and dirt out of the fins and from the back of the appliance until it’s all clear.

    Alternatively, you could try using a hairdryer to blow out any dust that remains.

    Once you have all the dust out of the way, it’s time to get busy with the soap and water.

    Grab your bucket and, using a non-abrasive cleaner (something like Stardrops is good) wipe your radiator down with a sponge, trying not to drip water all over the carpet.

    Once you’ve wiped from top to bottom and side to side take a dry cloth or a towel to wipe off the excess, this will ensure that your radiator won’t stain or rust and ruin your hard work.

    Be careful not use things like Brillo pads to do this part of the job as that may damage the surface of your radiator and make it look worse than when you began.

    EXTRA BITS TO KEEP IN MIND

    Vacuuming your radiators regularly will not only keep the dust at bay, but it could help prevent allergies too.

    Dust and dirt can aggravate conditions such as asthma and a range of other allergies, so making cleaning your radiators part of your normal cleaning routine can keep these conditions at bay and help to protect you and your family.

    There’s never a bad time to clean your radiators, but summertime is probably the best time to give them a thorough cleaning, as you won’t have your central heating on as much as you might in the winter months.

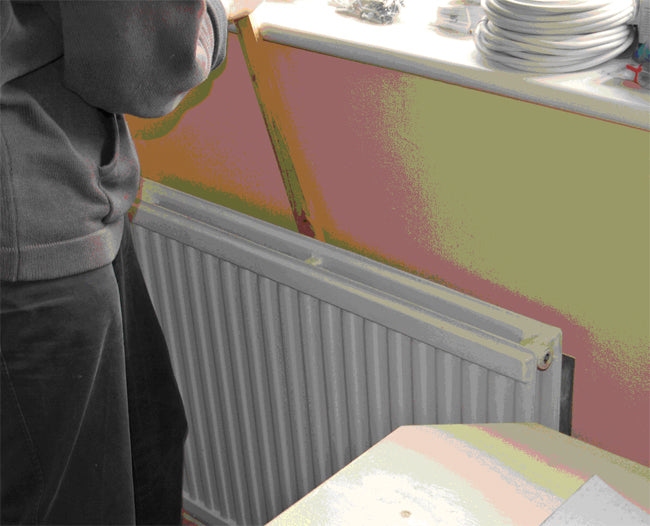
    And, if you really want to give your radiators the ultimate deep clean, why not take them off the wall altogether and power wash them with a hose – or perhaps even give them a new lease of life with a fresh lick of paint and match it to your living room colour decor.

    And there you have it, you should be well on your way to having a bright and brilliant radiator in no time with the help of these tips.

    For more heating advice, news and a range of how-to guides, please visit The BestHeating Blog, or if you fancy changing your radiators altogether, why not visit our store and find a shiny new one that is already clean and ready to heat your home in style?

    Come and browse our extensive collection of radiators at BestHeating.com – till then, stay safe & happy heating!

  • How to Bend Wood

    Bending wood is not the daunting task that it appears to be at first glance. Depending on the degree of bend, and whether or not the bend is compound, there are a couple of methods for bending wood.

    curves-patio-furnitureFirst, you need to have a form to bend your wood around and clamp to to hold thedesired shape. Most bent wood will have a certain degree of "springback", so you must build your form with an allowance for this. And, unfortunately, there is no established formula for determining the degree of springback that a given species of wood will produce. Springback is also influenced by the bending method used. That is to say that steamed wood will spring, or "unbend" more than wood that is laminated and glued. Another variable is the type of glue used in laminating.

    As a general rule, the tighter the bend, the more the wood will spring back, making the allowance a matter of trial and error at best.

    As laminating thin strips is the easiest method, we'll begin with that process. The finished thickness of the project will have a direct bearing on the size of the strips to be used, but generally, the heaviest strip to use is about ¼" thick. Tight bends may have to be done with 1/8" strips or thinner, depending on the wood species. Sounds like a lot of experimenting, but I'm afraid that's a necessary evil.

    bend-woodThe form required for laminating can be as simple as a piece of pipe or as complex as a multi-station die. I like to keep things as simple as possible.

    When laminating thin strips, you can minimize effort and spring back by soaking the strips before bending, and clamping them in the mold without gluing. Once they are dry, remove them from the mold, spread the glue and re-clamp them in the mold. Line the mold with waxed paper to prevent the lamination from sticking to the mold.

    When I soak strips, I do so in an open container, and depending on the wood and the size of the strips, I soak them from 15 minutes to overnight. I also mix in a half cup of fabric softener per gallon of water. I find that it softens wood nearly as well as fabric.

    If the project is small, and open time on the glue is not a factor, I'll use poly-vinyl-acetate, or aliphatic resin glue. If I need more working time, I'll use epoxy or resorcinol. I stay
    away from the quick setting epoxies, however, because they rarely harden to the extent that the slow sets do. If you're using light colored wood, resorcinol dries to a reddish color which might be objectionable on a finished project.

    When bending thin woods such as guitar sides, the wood is commonly soaked as above, but it is bent over a hot bending jig, either electric, or heated with a propane torch. Brittle woods are supported on the outside of the bend with a thin stainless steel band to help prevent cracking. Green woods can be bent much in the same way, or by heating the wood over hot coals or with a good heat gun.

    For projects where lamination is objectionable, or when the wood is to be bent in compound curves, a steam box is the answer. One can be made fairly economically from PVC pipe, but it needs to be supported to keep the pipe from deforming.

    The ends of the pipe need to be closed with a screw cap on at least one end, to allow access to the interior. Fit the other end of the pipe with a DWV reducing tee, and attach a radiator hose to the side outlet and to a new gas can large enough to hold sufficient water to last through the job. The water may be heated with a hot plate or a propane burner.

    Drill through the pipe slightly below center in two or three locations and insert dowels for the wood to rest on. Steam must be allowed to circulate freely around the wood for even penetration. A hole about ½" in diameter should be drilled in the cap furthest from the steam inlet to allow circulation. When you build the support frame for the steam box, pitch the box toward the steam inlet to allow the condensation to return to the water supply.

    Rule of thumb says that wood should be steamed fifteen minutes per inch of thickness, but here again, some experimenting will be necessary.

    The wood needs to be placed into the form as quickly as possible, because as the wood cools, it is more difficult to bend. Make sure that your wood is at least two feet longer than the finished part, because it's nearly impossible to bend a 3/4" piece of wood that is less than a foot long, so that last foot will have to be cut off after the wood is dry.

    Clamp the wood in the form securely, and leave it there until it is completely cool. If you are working with multiple pieces, place them in the steam box a approximately the interval required to place the piece in the form and clamp it, and remove them from the box in the same order.

    With a little practice and a little luck, it shouldn't take long to become proficient in wood bending. Good luck with your project, and if I can be of any help or answer any questions, feel
    free to respond to this post, or email me at campbell5017@bellsouth.net .

    To get the e-book "How To Bend Wood" as well as other e-books I have written on various aspects of woodworking, click here.

    Grant Campbell. Grant has been a professional woodworker for over 50 years. He would like to pass on some of his favourite tips and techniques through his articles

  • How To Paint A Brick Fireplace

    Learn how to transform an old fireplace with new paint and molding.

    We brought an old fireplace back to life with a little elbow grease, a couple coats of paint and new mantel (materials found at a salvage shop). It was cheap, easy and the results are stunning.

    CI-Susan-Teare_Brick-FireplTools and Materials
    wire brush
    screwdriver
    tape measure
    chop saw (optional, if extra wood is added to mantel)
    studfinder
    simple recycled mantel (to slip over the old stone mantel)
    (2) salvaged boards (optional for larger mantel)
    4 to 8 long screws
    paintbrush and painter's tape
    white paint for mantel (eggshell, latex)
    paint for brick (eggshell, latex)
    black heat resistant paint for firebox
    sandpaper
    wood glue
    wood filler
    water/white vinegar spray
    rags
    shop vacuum

    Here's what the fireplace looked like before:
    Original-Brick-Fireplace_Before_s4x3_lg

    Scrub the Brick
    Lay down a drop cloth to make clean up easier. Use a wire brush to get all the dust and sot off the brick fireplace. Vacuum the entire area.
    Original-Brick-Fireplace_Scrubbing-Brick_s3x4_lead

    Wash the Brick
    Spray the fireplace brick with a 50/50 mixture of water and vinegar then use a rag to clean off any residue so the paint and adhesives can stick.
    Original-Brick-Fireplace_Spray-Vinegar_s3x4_lead

    Paint the Inside
    Paint the inside the firebox area with special heat-resistance paint. Apply two coats if necessary.
    Original-Brick-Fireplace_Painting-Inside-Box_s4x3_lead

    Paint the Brick
    Paint the rest of the brick with your paint color. Brick is porous, so make sure to push the paint into the brick so there are no pinprick holes showing. Apply a second coat if necessary.
    Original-Brick-Fireplace_Painting-Brick_s3x4_lead

    Build a New Mantel
    Measure the current mantel top and plan a design. We got lucky and found a simple mantel at a recycle center that will slip over our existing mantel. We added molding to the newly found mantel to give it more interest. We attached the molding with wood screws, covered the holes, then sanded and painted the entire mantel.
    Original-Brick-Fireplace_Mantel-at-Resale-Shop_s3x4_lead
    Original-Brick-Fireplace_Mantel-With-New-Molding_s4x3_lead
    Original-Brick-Fireplace_Painting-Mantel_s4x3_lead

    Install the Mantel
    Place the mantel over the top of the old mantel. Find the studs in the wall, they should be just at the edge of the fireplace. Toe-nail the screws into the mantel through the wall.

    Fill the screw holes with wood filler, let dry, sand and then paint to match the mantel.

    Joanne Palmisano - Joanne is the author of Salvage Secrets

  • Drill Or Glue? Secure Adhesive For Bathroom Accessories

    ZACK adhesive set ZACK MOUNT

    zack_mount_logoZackMount is ideal for attaching wall mounted itens without having to drill holes and is suitable for many different products on stable, rough and smooth surfaces, both indoors and outdoors. It is now no longer necessary to drill through your valuable tiles. The answer is adhesive. And, when you want to remove the mount in question, this can be done quite simply and without leaving any traces.

    zack-mountNumerous bathroom products from ZACK are already prepared for this progressive mounting method. They are identified by the red ZackMount emblem on the packaging.

    The adhesive is provided in two packaging sizes (6g / 13g) and is sufficient for 2 and 4 mounting plates respectively.

    As always, available now from Proleno!

  • Living Room Colour Schemes

    Wall Colours impart an attractive effect in your every room when chosen well. But may the excessive use of bold paint colours on walls makes your family room disturbing and you can get irritated using the bold paint colour. So it's better to choose paint colours by knowing their effects in your living environment andbody.When you're going to choose paint colour, then always think about the amount of sunlight entering into your family room. The paint colours also rely on the style of your room.

    living-room-color-schemesNeutral paint colours for family room are always calm and elegant, so a palette of white, cream, taupe, grey and brown is really a classic option for a living room that has got to please everyone. Select any one of paint colour themes for example monochromatic, analogous, complementary, triad, split-complementary, warm, cool or neutral colours. You are able to apply paint colours which will highlight your living room colour design. Feel the article to know the latest paint colour trends for walls to improve your living room.

    Living Room- Green Colour Paint

    Green colour imparts a brand new feel to your living room. You may make your living room relaxing by utilizing green paint colours. It is best to use light hues of green colour so you feel comfortable in your living room. If you are using a little amount of white or yellow colour with green colour paint, it will give a dashing turn to your living room. If you are a true lover of natural splendor, then you can add some fresh plants or flowers to intensify your living room. Add wood furnishings to enhance the look of your family room interior.

    Paint-Ideas-For-Modern-LiviLiving Room- Yellow Colour Paint

    Yellow colour provides a welcoming look to the living room. Whenever you apply yellow colour paint within the living room, then it will give a haunting turn to the interior theme. You can also apply yellow paint colour in poorly lit foyers or dark hallways. You can test a medley of yellow and violet colour that will give a superb contrast, but play one colour as a dominating colour and also the other as an accent.

    Living Room- Blue Colour Paint

    For any cool and refreshing look, you are able to choose blue colour paint. Should you apply blue, red and yellow triadic colour paint, it will create a wonderful atmosphere inside your living room. For a different feeling, use a tint of blue colour paint with white colour.

    Living Room- Brown Colour Paint

    Brown colour paint provides a classy look to your family room. Mostly furniture such as wood furniture etc. is available in deep brown colour. You are able to match this scheme with a green wall paper for a different look. The hues of brown and green paint get complement the natural wood accents. The contrast colour paint looks pleasing to eyes.

    Living Room- Red colourization Paint

    If you want to add luxurious feeling for your living room, the red colour paint works more effectively. Red colour paint gives you energy to complete work throughout the day. But use red colourization paint either on one or two walls of the living room. If you use too much red colourization in your room, then you will definitely get feel restless after sometime. A mix of red and green colour paint or green and dark coloured paint looks fantastic but play one colour as a dominating colour and also the other as an accent.

    Living Room- Neutral Colour Paint

    Neutral colour paint is extensively utilized in the various living room designs. You are able to better display your artwork, wall paintings and then any type of wall décor on neutral colour scheme within an effective way. You can mix any colour paint using the neutral colour scheme to provide your living room a sophisticated look.

    Living Room- Grey Colour Paint

    For any modern and sober look, you should use grey colour paint. Grey colour is dull in addition to cold. But for a different look, you are able to combine two or more colours paint out of your living room scheme. Being a neutral colour schemes, you are able to combine grey colour paint with just about any colours. You can try greyish yellow or red colourization paint to perk up the feel of your living room interior. Should you opt for simple furniture and accessories, then your modest grey colour paint provides a graceful and sophisticated look to the lounge.

    Living Room- Orange Colour Paint

    Orange colour provides a warm feeling to your family room. But it is more friendly and welcoming colour than the red colour. Orange colour paint will absolutely add interest and zest for your living room design.

    Add More Colour on walls with Amazing Ideas

    1. You are able to paint one wall of the living room with a bold colour making this wall the focal point from the room. If you choose any contrast colour for that rest walls of the room, it will give a tempting look to your family room.
    2. Avoid monotonous atmosphere from the living room by adding a few notes of energetic colours for example green or cobalt blue if you work with white colour for decorating whole room.
    3. Use energetic colours for furniture if you wish to paint your living room with single soft tone for example off white.
    4. Paint one wall with indigo, dragonfly green or scarlet colour paint and employ the same shade on a few accessories like flower pots or cushions to produce a sense of continuity.
    5. Never apply dark colours of paint for small rooms because they make the rooms look smaller.
    6. Use soft colour to help make the space look larger.
    7. You may create a serene and tranquil atmosphere by making use of soft tones of blue with white, beige and ochre shades.
    8. For any new look, you can add fresh flowers and plants for your living room.
    9. Paint your ceiling with white colour paint to maximise the sense of light and space.
    10. Special lighting can change the entire atmosphere of the living room.
    11. You can choose a table lamp with stained glass lampshade for providing an impressive look.

    James King - James is a professional writer and editor.

  • Shutters vs. Blinds

    11123428Which Ones are Better?

    Well, there is no easy answer to that question, since both of these window coverings have basically the same function, but when it comes to details I think that you will be able to pick one over the other. In order to help you with your choice I decided to confront shutters vs blinds, and based on their comparison I think that you will be able to make the right decision.

    Shutters – why Pick them?

    Shutters can be found in many different colours and designs bur can be also easily painted in any colour in order to match them with the overall room colours. Being as they are, they can be mounted both inside and outside of the house. When mounted outside, they can be used as a decorative item for your house, but if you mount them on the hinges on the exterior wall, they can protect your windows from breaking during storms, strong wind, etc. These window treatments are typically made of wood, and being made of wood they will bring the natural element to your room décor. They will also bring that traditional look which people tend to search for, when decorating the rooms. However, they are more expensive than the blinds, but they can be cheaper if you are looking at the bigger picture, since wood shutters act as great insulators, which again means that they will save your money when it comes to heating and cooling bills in the long run. Plantation shutters are the best window insulator. Because they consist of slats which are fitted tighter than the blind slats, a smaller amount of light will be able to penetrate through them, which cannot be said for the blinds.

    Blinds – what Makes them Special?wooden-window-shutters1

    Window blinds are looking good on any type of windows, and they can be manufactured in many types of material, and the most common materials are: aluminium, PVC, MDF, metal, they can be also made in fabric (Roman blinds and Roller blinds), but since we are talking here about some sturdier window treatments we will leave them behind. Sturdier ones are made of wood or aluminium. Venetian blinds can be used on both windows and doors. Being made of thinner slats, you can always customise them and make them fit any size or shape of the window. Because of their material, they can be found in many different colours and shades and patterns, which is not the case with their opponents. They are also very easy to use, since they can be closed or opened by the twist of the wand or raised at the certain level of the window by pulling a cord. Faux wood blinds are made of PVC material and because of that they are very good option for the kitchen or the bathroom, since most of them are moisture resistant, while wooden ones can warp if they get in touch with water.

    home_large11Final Choice...

    Well that's really up to you, but you should have in mind all of these factors and based on them make the right decision. Shutters are a bit expensive, but they will offer much more privacy, yet blinds, because of their versatility in materials and colours, can be easily incorporated into any type of room design, so the final decision should entirely be up to you.

    Take a look at Shaftesburys for more info on our top end Plantation Shutters. Shaftesbury Shutters offer a full service, (design + fit) for a complete range of high quality Plantation Shutters.

    Mark Row - Mark Row is a professional freelance writer and SEO Expert working for a number of websites.

  • Improving your home on a budget

    In a world where nobody has the money they once did it is harder to do things that in the past were quite straight forward. Improving your home is one example of how you want to make improvements but it seems like whatever you want to do it just costs a fortune. Well there are a number of ways to do up or improve your home without it costing a fortune. Each one is relatively simple and cost effective. Combine them all to give your home a real boost.1010214

    The first and easiest way to make a difference is to go down to your local do it yourself shop and buy some paint. This is both affordable and effective and what is even better is that it is something you can do yourself without the need for getting in a specialist. This can leave your home looking fresh and bright which can boost the overall feel of the whole house.

    Moving on from the painting you can then get fresh new carpets. While this will cost a little more than some tins of paints it will help with the changing of the overall look and feel of your home. It is quite amazing what a difference new carpet can be. It can be a cheap make as many are still quite hardwearing and even with underlay and grip strips it is still an affordable way to boost the look of your home.

    4729949669_1f7c1ed561_mMoving on from the cheaper options another way is a fresh bathroom. You may think that this is expensive and compared to paint and carpet you would be right however if you buy the suites yourself and simply hire someone to install it you can keep costs down. Also by going for a clean white suite you can have a fresh look without breaking the bank. If you are planning to move then this is a must as the bathroom along with the kitchen is one room people pay close attention to.

    As mentioned the kitchen is a room people take notice of. That is why you need to make sure it is improved well. This doesn't mean you have to replace the lot but maybe getting new handles for the cupboard doors or even new doors completely along with new flooring and again some paint on the walls. You would be amazed at how good it can look without the need to rip the whole thing out and replace it.

    Once you have done these then turn your attentions to tidying and making sure you have the right storage for your needs. This is particularly important in the bedroom. By getting the right storage you can maximise the storage and keep your home clean and tidy which in itself can make all the difference to the look. This is also a great way to improve the look.

    Do one or two of these can make a difference. There is no need to build an extension or a brand new conservatory. Do them all and you cannot fail to make your home better. A clean tidy and fresh looking home is just what you need and it is more affordable than you think.

    Colin Stone - Colin Stone writes many articles about home improvement with a special interest in conservatory prices you'll love.

  • Creating the perfect dining room

    Shelves-2Dining room style and design can range from using the most traditional of oak tables, high backed chairs and candelabras, to the contemporary feel of glass and cool metallic touches teamed with a minimalist colour palette. There are countless options for how a dining room can look and feel, so it is important to begin by deciding on the intended use of the room; intimate dining for a couple or large dinner parties?

    Deciding on a feel

    The feel of the room will be dictated by the chosen style, so getting this right is essential. If the room will be used chiefly for entertaining, the style can be more formal, incorporating modern touches to traditional pieces of furniture or working around a theme or centrepiece. Personal taste will feature largely in these first decisions but once it has been decided what sort of feel the room should have, and what it will chiefly be used for, ideas will start to take shape.dining_table

    Taking inspiration from interior design blogs and magazines can throw up ideas for the next stage by suggesting how to fulfil the requirements of the room. If the room is taking on a relaxed, country feel, soft pine furniture and warm wooden display cabinets can look perfect against traditional china and floral vintage touches. A more formal dining room may call for a darker wood, such as mahogany, and more luxurious classic soft furnishings, such as upholstered chairs and floor length tieback curtains.

    Ideas for decoration

    Finding an appropriate main paint colour is the all-important starting point, and whether this colour is natural or more striking is an important initial decision. Many dining rooms do incorporate feature walls in striking reds or dark blues; however, opting for a darker paint colour calls for simpler plain pieces of furniture, and it can make the room appear smaller. Going for one main focus of the room, whether it is a wall hanging, a table or a centrepiece, means that other decorative touches can complement this feature. This will provide a balanced and tasteful colour scheme.

    Furniture requirements

    Most importantly, the room needs functional furniture that will allow the room to beXanadu_range_hero_639x348 used to fulfil its main purpose. Investing in a folding dining table could be worthwhile if space is limited, but if the room will need to accommodate large parties of visitors from time to time it will benefit from extending dining tables, as these allow for flexibility when accommodating large or small parties. Storage for tableware is important and furniture with storage space should be incorporated into the design to meet this requirement.

    The final touches

    Dining room accessories are the finishing touches in making a room individual and unique. The accessories will provide the final flourishes of style and tie the different aspects of the room together, so finding pieces that complement colour and furniture choices is important. Once the accessories are in place, the perfect dining room will be complete and ready to entertain guests and family members alike.

    Aimee Claire – Aimee is an enthusiastic, well-educated freelance writer with a passion for Interior Design. She is fascinated at how different patterns, textures and lighting can completely change the look and atmosphere of a room. One day she will run her own Interior Design company, but for now is happy experimenting with new designs in her own house.

  • French inspired interior design

    Think of a stylish nation and the French spring to mind almost immediately. With their cutting edge haute couture fashion, brilliant sculptors and painters, world-class film industry, elegant châteaux and fabulous gastronomy, the French really have style in abundance. They seem to have a skill for creating things of great beauty with very little effort – how do they do that?

    The Eiffel Tower, ParisTake their interior design style, for example. The French like to do things in extremes, whether it's the super-bling of the Palace of Versailles, a rustic Limousin farmhouse, elegant parquet-floored Parisian apartment or gilt-edged Baroque country house grandeur, it's guaranteed to look fabulous.

    To achieve a home that twinkles with Gallic charm there are a number of different routes to take. Depending on personal style, this could involve heading off in a rustic French farmyard direction with milk churns in the kitchen, gingham curtains and simple wooden French furniture, such as dressers and armoires, to create a truly continental accent.

    If grand interiors are required, then put together an elegant boudoir featuring ornately carved commodes (chest of drawers), large gilt framed mirrors, glittering chandeliers and a sumptuous chaise longue from which to relax and admire the view. The French are famous for being good in the bedroom, and this is certainly the case when it comes to the furniture! There can be fewer more French experiences than falling asleep in the soft, opulence of a mahogany sleigh bed; adding this particular item of furniture to a room instantly translates it into fluent French. Visitors to France should head for Brocantes, flea markets and Depot Ventes, all good hunting grounds for authentic furniture.

    Suite_ImperialeUpholstery and linens are taken very seriously across the channel. To get a French twist into fabrics, choose distinctive motifs such as fleur de lis and chintzy fabrics that catch the sunlight. Simple ticking, stripes and linens work well in more relaxed schemes, or for an injection of French formality try out one of the many Toile de Jouy designs, typically French and oozing style. These famous pastoral textile designs are mostly blues, reds and blacks on an ivory background. The designs have become so popular it is possible to acquire lampshades and wallpapers in the same range, to create a unified look.

    French_shuttersNow introducing a little French flair into the British home has long been a popular pastime. We have welcomed with open arms the chairs with their elegantly turned legs, the gigantic rustic dressers, the light and airy colour schemes and the antiques of the Louis Phillipe and Henri II periods. The naïve Provençal peasant furniture or the ornate dark woods of the Breton styles have all become familiar sights in British homes. Another inspired French invention that has really caught on over here is shutters, such as the type supplied by www.thecaliforniacompany.co.uk. Shutters are used to keep out the hot midday sun, to retain privacy and to insulate against heat loss at night. With a huge range of styles available, shutters offer an elegant alternative to curtains or blinds and lend an unmistakably French flavour to any room.

    With careful selection of some key furniture and design elements, it is possible to create a French inspired oasis within the home. Why not embark on a love affair with all things French – who knows where it could lead?

    Aimee Claire - Aimee is an enthusiastic, well-educated freelance writer with a passion for Interior Design. She is fascinated at how different patterns, textures and lighting can completely change the look and atmosphere of a room. One day she will run her own Interior Design company, but for now is happy experimenting with new designs in her own house.

  • Hospitality With A Cool Look

    ZACK ACCOLO coat rack

    The exquisitely finished coat rack is made of brushed satin 18/10 stainless steel. The practical living accessory impresses with its typical, exclusive ZACK material finish which lends the design article its unmistakable appearance and helps keep clothes arranged neatly and attractively.
    accolo

    The clear-cut shapes and the consistently timeless, clear-cut design language through which the ZACK articles fit harmoniously into a wide variety of furnishing worlds are the outstanding characteristics of the ZACK living accessories.

    Hang your hat on one now at Proleno

    Also available in six and eight hook lengths.

Items 1 to 10 of 23 total

Page:
  1. 1
  2. 2
  3. 3